Author 
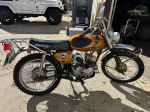
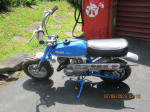
Topic: Winter work  (Read 3797 times)

0 Members and 1 Guest are viewing this topic.

Offline CL-100

  • Trade Count: (0)
  • Expert Registered Bridgestone Member
  • ****
  • Posts: 343
  • CL-100
Winter work
« on: January 06, 2019, 02:10:51 PM »
I found myself in need of doing some Bridgestone work during the holidays as I waited for the welder to open back up.  Apparently, there isn't much of a call for welding during the Christmas/New Year's school vacation days.  I had purchased a 350 parts motor back in early October in order to get the clutch, transmission, and kick start units for an upcoming project.  The motor was mostly complete so I thought I'd take the carbs apart and clean/rebuild them.  I disassembled them one at a time, ran them through the ultrasonic cleaner a few times as this engine is the dirtiest one I've ever seen.  I had to wait for a decent weather day in order to spend some time outside with the Dremel tool and finish the cleaning and polishing.  (I don't do any dirty work in my workshop).  I also spent some time tracing back the individual passages on an old carb body I had in order to learn how the carb moved fuel and air.  I learned a lot but a couple of the passages I couldn't figure out until I submerged the carb body in a bucket of water and forced air through various openings with a syringe and tubing. 

Anyway, pictures of the finished products are below.  I'm off to the welder tomorrow.


Offline slawsonb

  • Trade Count: (0)
  • Master Registered Bridgestone Member
  • *****
  • Posts: 1398
Re: Winter work
« Reply #1 on: January 07, 2019, 12:13:56 PM »
Looking good!

...bert

Offline moonpup

  • Laidback Purist
  • Trade Count: (0)
  • Master Registered Bridgestone Member
  • *****
  • Posts: 2266
Re: Winter work
« Reply #2 on: January 07, 2019, 04:19:05 PM »
Very nice.

Were you able to get the "needle jet" (#17 in parts manual) out and get it & the shaft it fits into real clean?  I found when cleaning 3 set of carbs, that even after using my ultrasonic cleaner, it was still quite gummed up & dirty when I pulled those out.
Confucius say... "Better to have Bridgestone than Kidneystone"

Offline CL-100

  • Trade Count: (0)
  • Expert Registered Bridgestone Member
  • ****
  • Posts: 343
  • CL-100
Re: Winter work
« Reply #3 on: January 08, 2019, 03:33:40 PM »
I had no problem cleaning the needle jet piece and the orifices.  When I go to use the ultrasonic cleaner I fill it with a 4:1 solution of Simple Green and water.  I let the cleaner heat the water up to about 50-55 degrees C with the parts already soaking in the solution.  Once everything is good and warmed up, I turn the ultrasonic cleaner on for a 20 minute cycle.  I don't like the noise this thing makes so I always leave the room and work on something else.  Therefore, the parts have a tendency to sit in the warm water for quite a while after the cycle ends.  When I return, I pull the parts out and squirt through all the orifices with WD40.  I personally feel that WD40 isn't the panacea of cleaning solutions but for temporary light cleaning and lubing it works.  If it doesn't seem that all the openings are good and clear, I'll run the ultrasonic cycle again. 

These carbs were mostly dirty from old dried up gas and oil.  During disassembly I had the most difficulty in getting the slides out.  They seem to be pretty delicate so I don't use metal tools to try and move them up the shaft.  I use a lot of penetrating oil and sometimes run it through the ultrasonic machine partially assembled in order to loosen parts up.  Interestingly enough, I guess a previous owner had been in the carbs before as the choke plunger spring was missing in one of the carbs. 

Hope this helps.

Offline Steve Swan

  • Trade Count: (0)
  • Full Bridgestone Member
  • ***
  • Posts: 110
Re: Winter work
« Reply #4 on: January 08, 2019, 09:32:33 PM »
I had no problem cleaning the needle jet piece and the orifices.  When I go to use the ultrasonic cleaner I fill it with a 4:1 solution of Simple Green and water.  I let the cleaner heat the water up to about 50-55 degrees C with the parts already soaking in the solution.  Once everything is good and warmed up, I turn the ultrasonic cleaner on for a 20 minute cycle.  I don't like the noise this thing makes so I always leave the room and work on something else.  Therefore, the parts have a tendency to sit in the warm water for quite a while after the cycle ends.  When I return, I pull the parts out and squirt through all the orifices with WD40.  I personally feel that WD40 isn't the panacea of cleaning solutions but for temporary light cleaning and lubing it works.  If it doesn't seem that all the openings are good and clear, I'll run the ultrasonic cycle again. 

These carbs were mostly dirty from old dried up gas and oil.  During disassembly I had the most difficulty in getting the slides out.  They seem to be pretty delicate so I don't use metal tools to try and move them up the shaft.  I use a lot of penetrating oil and sometimes run it through the ultrasonic machine partially assembled in order to loosen parts up.  Interestingly enough, I guess a previous owner had been in the carbs before as the choke plunger spring was missing in one of the carbs. 

Hope this helps.

thanks you for the nice write up!  i use an electric heat gun to move slides that are stuck from old gas's gum; works very well every time.

zip strip paint remover removes any amount of dried gas-gum from gas tanks.

Offline CL-100

  • Trade Count: (0)
  • Expert Registered Bridgestone Member
  • ****
  • Posts: 343
  • CL-100
Re: Winter work
« Reply #5 on: January 21, 2019, 12:19:00 PM »
More winter work.  While I was waiting for the welder to finish on my 350 frame I thought I'd tackle something on my BS50 Sport, which will be my next project.  I've been collecting parts for the 50 for a while and I decided to try and replace the seat cover myself.  I had bought a Pit Replica cover a while back so after some online research I gave it a try.

The old cover had a number of punctures and small rips so I could only guess what the foam was going to be like.  I forgot to take pictures of the uncovered seat foam but I was pleasantly surprised.  The foam was wrapped with light clear plastic that was mostly intact.  The underside of the seat cover had a large-ish water stain, but the foam was in great condition.  I bent all the seat pan prongs out, removed the trim pieces, taped the plastic covering back in place and went at it.  I did use a heat gun quite a bit to stretch the vinyl, but it went on without too much trouble.  The cut of the Pit Replica cover was a little wide in middle down both sides.  This took a little maneuvering in order to get it to line up correctly with the prongs.  The hardware holding the trim pieces on was in pretty bad shape so I substituted 3mm panhead screws, flat washers, lock washers, and nuts.  The 3mm panheads and a flat washer fit perfectly in the channel on the backside of the trim strips.

All in all, I'm happy with the way it turned out. 


Offline BRT-GTR

  • Brian
  • Trade Count: (0)
  • Master Registered Bridgestone Member
  • *****
  • Posts: 951
Re: Winter work
« Reply #6 on: January 21, 2019, 05:24:37 PM »
            CL,   First class job on the seat and a great solution for fixing the trim strip. Couldn't look any better had you sent it out to a professional seat resto company.
                                                                                                            Brian.
Unspoiled by progress.
I'm so glad I grew up in the 60s & 70s. I did so much stupid stuff and there's no record of it.............Anywhere !!

Offline slawsonb

  • Trade Count: (0)
  • Master Registered Bridgestone Member
  • *****
  • Posts: 1398
Re: Winter work
« Reply #7 on: January 22, 2019, 11:38:50 AM »
Looks great!
...bert

Offline Jeff Bar

  • Trade Count: (0)
  • Expert Registered Bridgestone Member
  • ****
  • Posts: 484
Re: Winter work
« Reply #8 on: January 22, 2019, 01:04:20 PM »
You are the seat man!  iagree. Jeff Bar

Offline CL-100

  • Trade Count: (0)
  • Expert Registered Bridgestone Member
  • ****
  • Posts: 343
  • CL-100
Re: Winter work
« Reply #9 on: January 22, 2019, 03:00:49 PM »
Thanks to all for the nice comments.  As this was my first attempt at recovering a seat, I'm pleased with the outcome.

Rowland

Harry

  • Guest
  • Trade Count: (0)
Re: Winter work
« Reply #10 on: January 23, 2019, 02:24:41 PM »
GREAT JOB on the seat. I had mine done 25 years ago and it still looks great. Harry

Offline CL-100

  • Trade Count: (0)
  • Expert Registered Bridgestone Member
  • ****
  • Posts: 343
  • CL-100
Re: Winter work
« Reply #11 on: January 23, 2019, 03:56:04 PM »
Harry,

Thanks for your positive comments.

Rowland

Offline RayK

  • Trade Count: (0)
  • Master Registered Bridgestone Member
  • *****
  • Posts: 569
Re: Winter work
« Reply #12 on: January 24, 2019, 01:21:29 AM »
Great job Rowland.
Cheers Ray
BS 175DT, BS 50 Sport x 1, BS 90 Mountain x 3, BS 90 Deluxe, BS 90 Sport x1, BS 60 Sport, BS 90 Trail, BS100 Sport.

Harry

  • Guest
  • Trade Count: (0)
Re: Winter work
« Reply #13 on: March 18, 2019, 02:55:40 PM »
WOW!!!  What a great job.  I had mine reupholstered in the late 90s and it still looks good.

Offline CL-100

  • Trade Count: (0)
  • Expert Registered Bridgestone Member
  • ****
  • Posts: 343
  • CL-100
Re: Winter work
« Reply #14 on: March 18, 2019, 04:06:02 PM »
Yet some more winter work.  These are before and after pictures of a 350 dynamo I refurbished from a parts motor I bought last fall.  I hooked the dynamo up to a drill and an electric meter to make sure it was generating voltage and it works well.  I'm currently working on front fork lowers for a cafe project and will post those pictures soon.


Offline rwgibbon

  • Trade Count: (2)
  • Master Registered Bridgestone Member
  • *****
  • Posts: 578
  • 1968 BS 350 GTR
Re: Winter work
« Reply #15 on: March 18, 2019, 04:26:19 PM »
Very nice!

Offline hardy

  • Trade Count: (0)
  • Full Bridgestone Member
  • ***
  • Posts: 187
Re: Winter work
« Reply #16 on: March 19, 2019, 09:23:27 PM »
Looks great, and a very nice finish.

Offline BRT-GTR

  • Brian
  • Trade Count: (0)
  • Master Registered Bridgestone Member
  • *****
  • Posts: 951
Re: Winter work
« Reply #17 on: March 20, 2019, 08:40:41 AM »
              Nice restoration, looks better than new. Did one myself last year, if you haven't done it (can't tell) would recommend lacquering the iron core or it will rust. I also ran  beads of engine case sealant around the core before assembling in an attempt to keep water out.                                                                   Brian.
« Last Edit: March 20, 2019, 10:13:44 AM by BRT-GTR »
Unspoiled by progress.
I'm so glad I grew up in the 60s & 70s. I did so much stupid stuff and there's no record of it.............Anywhere !!

Offline CL-100

  • Trade Count: (0)
  • Expert Registered Bridgestone Member
  • ****
  • Posts: 343
  • CL-100
Re: Winter work
« Reply #18 on: March 20, 2019, 03:22:48 PM »
I haven't cleared the core yet.  I have three of these sitting on the shelf right now for various projects and noticed the first one starting to rust.  For now, I cleaned it with Mother's and treated it with White Diamond metal polish.  I then packed it in a large freezer zip lock with a couple of desiccants in it.  Once the weather warms, I'll clear them all.

Offline Bridgestone Man

  • Trade Count: (0)
  • Full Bridgestone Member
  • ***
  • Posts: 161
Re: Winter work
« Reply #19 on: March 20, 2019, 06:31:32 PM »
CL. Wow that seat is nice, you did a great job. Sam


Gallery


Views:330
Comments (0)
By: Jon West

Views:1465
Comments (0)
By: rwgibbon

Views:1797
Comments (0)
By: Perry L Anderson

Views:1867
Comments (0)
By: Perry L Anderson

Classifieds

BS 175 DT Carburettors Mikuni VM 17 s

Price: 180.00 EUR
Date: 04/14/2024 09:55 am
Time Left:
BS175 DT 1966 Gas Tank

Price: 180.00 EUR
Date: 04/14/2024 09:37 am
Time Left:
Gto
Date: 03/02/2024 06:49 am
Time Left:
Looking for a BS90 used or new luggage Carrier assembly

Date: 02/01/2024 04:19 pm
Time Left:

Recent Downloads added

Parts Manual BS-7 Std & Deluxe with new style part numbers
Rating: (None)
Filesize: 5483.15KB
Date: Yesterday at 10:15:22 AM
Chibi, Chibi Deluxe, Tora Service Manual
Rating: (None)
Filesize: 20383.27KB
Date: May 01, 2023, 08:35:39 PM
Chibi_Tora_Parts_Manual
Rating: (None)
Filesize: 14301.44KB
Date: May 01, 2023, 08:25:53 PM
BS200 Mk II RS & MK II SS Exclusive Parts
Rating: (None)
Filesize: 358.29KB
Date: March 07, 2021, 07:30:10 PM

Powered by EzPortal